The hazard perception test forms a key part of the driving theory exam in the UK. It checks if learners can spot dangers on the road and respond quickly enough to stay safe. Many test takers find this section challenging, even with lots of preparation.
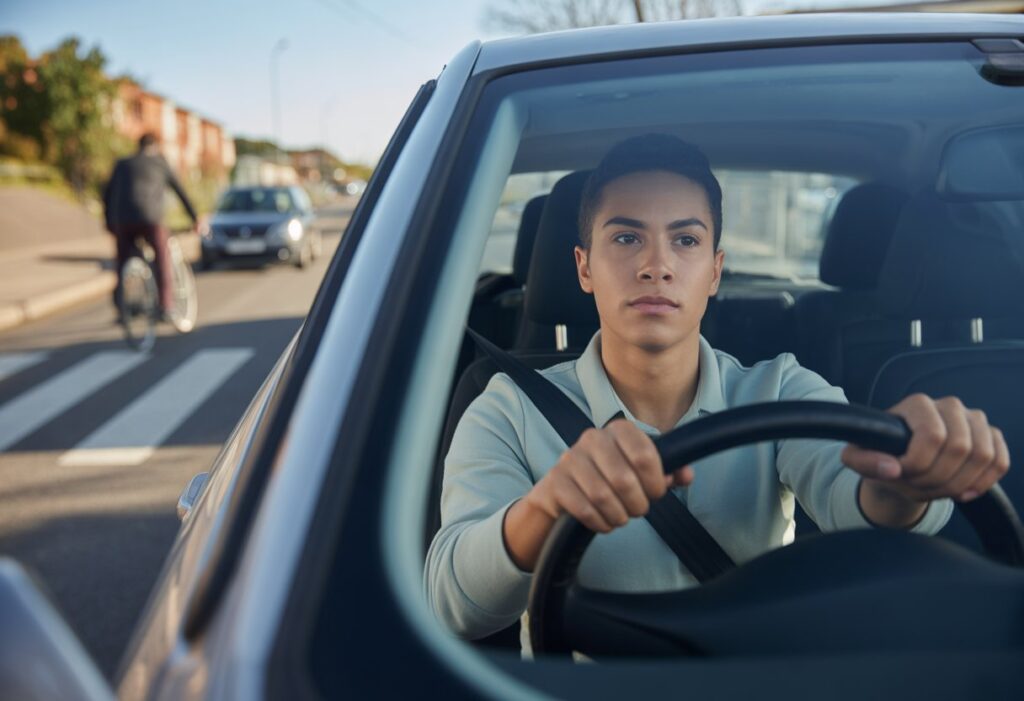
The test requires watching video clips of everyday driving scenes and clicking when a developing hazard appears, with earlier clicks earning more points. Understanding when to click and what counts as a real hazard makes the difference between passing and failing. The pass mark demands accuracy and quick reactions.
This guide covers the main types of hazards drivers will see, proven techniques for scoring well, and practical ways to prepare or if you want a broader overview, see our complete guide to the UK theory test.
With the right approach and regular practice, learners can build the skills needed to pass first time. The strategies explained here help test takers stay focused and spot hazards like experienced drivers.
Understanding the Hazard Perception Test

The hazard perception test forms a critical part of the driving theory test in the UK, assessing a learner driver’s ability to spot potential dangers on the road before they become serious problems. This computer-based assessment uses video clips to measure reaction times and awareness skills that directly impact road safety.
Purpose and Importance of Hazard Perception
The hazard perception test evaluates whether learner drivers can identify and respond to dangerous situations whilst driving. Introduced in 2002, this assessment ensures that people taking their driving test possess the awareness needed to drive safely on real roads.
The test measures how quickly someone spots a developing hazard. Faster recognition means more time to react and avoid accidents.
Every learner driver must pass this test before they can book their practical driving test. It sits alongside the multiple-choice section as one of two parts of the theory test. Without passing both parts, a learner cannot progress to the driving test itself.
The skills tested reflect real-world driving situations. Recognising hazards early reduces the risk of collisions and improves overall road safety for everyone.
Test Format and Structure
The hazard perception test contains 14 video clips that show everyday driving scenarios from a driver’s perspective. Each clip lasts about one minute and features real road situations.
Thirteen clips contain one developing hazard, whilst one clip includes two developing hazards. Test-takers must click the mouse or touch the screen when they spot a hazard forming. The test scores based on how quickly someone responds to each developing hazard, with a maximum of five points available per hazard.
The total possible score is 75 points. Learner drivers need to score at least 44 points to pass, though this pass mark can vary slightly.
Difference Between Hazards and Developing Hazards
A hazard is anything that might cause a driver to change speed, direction, or stop. This includes parked cars, road signs, pedestrians on the pavement, and oncoming traffic. These are static or predictable elements of the road environment.
A developing hazard is something that requires immediate action from the driver. It involves a situation that is actively changing and becoming more dangerous. Examples include a pedestrian stepping off the kerb, a car pulling out from a side road, or a vehicle braking suddenly ahead.
The hazard perception test only scores responses to developing hazards. Clicking for static hazards or potential dangers that never develop will not earn points. Understanding this distinction is essential for achieving a passing score on the theory test.
Essential Tips for Spotting Hazards

Spotting hazards quickly and accurately requires understanding what to look for and maintaining focus throughout the test. The DVSA designed the test to assess real-world driving skills, so recognising early warning signs and predicting other road users’ behaviour are crucial abilities to develop.
Recognising Early Warning Signs
Potential hazards rarely appear without warning. A learner should watch for visual clues that indicate danger might develop. Parked cars with visible exhaust fumes suggest someone might pull out. Pedestrians standing near the kerb, especially those looking towards the road, may step out suddenly.
Road signs and markings provide important information about upcoming hazards. A school warning sign means children could run into the road. Zebra crossings, traffic lights, and junction markings all signal areas where hazards commonly develop.
Weather conditions and road surfaces also serve as warning signs. Wet roads mean longer stopping distances and potential skidding. Leaves or ice on the road create slippery surfaces. Bright sunlight can blind drivers and make it harder to see pedestrians or cyclists.
Drivers should scan the entire scene, not just the vehicle directly ahead. Looking further down the road helps identify developing situations before they become immediate dangers.
Anticipating the Actions of Other Road Users
Other road users create the majority of hazards in driving scenarios. A car ahead might brake suddenly if its brake lights illuminate. Cyclists often need to swerve around drains or potholes, moving into the path of other vehicles.
Pedestrians exhibit behaviour patterns that indicate their intentions. Someone carrying shopping bags near a crossing will likely use it. Children playing near the road may chase a ball into traffic without warning. Elderly pedestrians might move slowly or change direction unexpectedly.
Motorcyclists and cyclists are smaller and harder to spot, particularly in blind spots or poor weather. They may filter through traffic or appear suddenly from side roads. Large vehicles like lorries and buses need extra room for turning and can block the view of other hazards.
Staying Alert and Focused During the Test
Concentration levels directly affect hazard detection ability. Test takers should eliminate distractions and focus entirely on the screen. Each clip lasts around one minute, which means hazards can develop quickly.
The eyes should constantly move around the scene rather than fixing on one spot. Scanning the footpaths, side roads, and distant traffic reveals developing hazards earlier. This active observation mirrors how drivers should behave on real roads.
Test takers must avoid clicking too early or too frequently. The DVSA scoring system penalises pattern clicking or clicking before a hazard actually develops. A genuine hazard is something that would require a driver to change speed or direction.
Staying calm helps maintain focus throughout all video clips. Getting anxious about previous clips reduces concentration for the remaining ones.
Common Types of Hazards to Expect
The hazard perception test features 13 common hazard categories that drivers encounter on UK roads. These hazards fall into three main groups: road users and pedestrians who change their behaviour, changing road conditions that affect visibility or grip, and junctions where multiple traffic streams meet.
Road Users and Pedestrians
Pedestrians create some of the most frequent hazards on the test. Children playing near the kerb, elderly people crossing slowly, or someone stepping between parked cars all require quick reactions. Drivers must watch for pedestrians near bus stops, zebra crossings, and residential areas.
Cyclists and motorcyclists present unique challenges because they’re smaller and harder to spot. A cyclist wobbling or looking over their shoulder often signals they’re about to change direction. Motorcyclists filtering between traffic lanes can appear suddenly in blind spots.
Other vehicles cause hazards when they brake unexpectedly, pull out from side roads, or reverse without warning. Learner drivers with L-plates may hesitate or stop suddenly. Large vehicles like lorries and buses have bigger blind spots and need more time to manoeuvre.
Animals on or near the road demand attention too. Dogs running loose, horses being ridden, or wildlife near country roads can all become developing hazards.
Changing Road Conditions
Weather creates multiple hazards that reduce visibility and road grip. Rain makes road surfaces slippery and increases stopping distances. Fog and mist limit how far ahead a driver can see, making it harder to spot potential dangers early.
Ice and snow dramatically change road conditions. These surfaces reduce traction and make steering and braking less effective.
Sunlight causes problems when it’s low in the sky. Glare can blind drivers temporarily or make it difficult to spot road signs, traffic lights, and other road users.
Road surface changes also create hazards. Loose gravel, oil spills, wet leaves, and puddles can all reduce grip. Potholes and uneven surfaces affect vehicle control.
Junctions and Obstructions
Junctions are high-risk areas where multiple traffic streams cross paths. Vehicles emerging from side roads may not see approaching traffic. Drivers must scan left and right whilst also checking mirrors.
Traffic lights changing from green to amber create a developing hazard. Some drivers rush through whilst others brake suddenly.
Parked vehicles obstruct views and create blind spots. Children, cyclists, or pedestrians can step out from between parked cars without warning. Car doors may open suddenly into the path of passing vehicles.
Road works and temporary obstructions change normal traffic patterns. Workers, equipment, and temporary road signs all require extra attention. Lanes may narrow or shift position.
Queuing traffic presents hazards because other drivers might pull out to overtake or pedestrians might cross between stopped vehicles.
Mastering the Test Technique
The hazard perception test rewards drivers who can spot dangers early and respond at the right moment. Success depends on understanding how the DVSA scores responses and developing smart clicking habits that avoid common pitfalls.
Effective Clicking Strategies
The test uses a window-based scoring system that rewards early detection. Drivers should click once when they first identify a developing hazard, not when the danger becomes obvious to everyone.
A single, well-timed click performs better than multiple rapid clicks. The ideal moment to respond falls between spotting the initial signs of danger and the hazard becoming fully developed. For example, clicking when a pedestrian approaches the kerb scores higher than waiting until they step into the road.
Drivers should watch for subtle cues like brake lights ahead, pedestrians near crossings, or vehicles emerging from side roads. These early warning signs provide the best opportunity to score maximum points. The system registers clicks throughout the hazard’s development, but earlier responses within the scoring window earn more marks.
Practising with official DVSA clips helps drivers recognise the timing that examiners expect. Each hazard offers a scoring window of approximately five seconds, divided into zones worth different point values.
Understanding the Scoring System
The DVSA awards up to five points per hazard, with one clip containing two scoreable hazards worth five points each. Test-takers need 44 points out of 75 to pass.
The scoring window opens when a hazard begins developing and closes when it becomes unavoidable. Early clicks within this window score five points, whilst later clicks score progressively fewer points. Missing the window entirely results in zero points for that hazard.
The system uses three scoring zones:
- Early zone: 5 points
- Middle zone: 4-3 points
- Late zone: 2-1 points
No points are awarded for clicking before the scoring window opens or after it closes. The test doesn’t penalise single mis-clicks outside hazard windows, but pattern-based clicking triggers the fraud detection system.
Avoiding Over-Clicking and Common Mistakes
The DVSA’s anti-cheating software detects rhythmic or excessive clicking patterns. Drivers who click continuously or in regular intervals receive zero points for that clip, regardless of whether they identified the hazard correctly.
Over-clicking happens when nerves take over or when drivers lack confidence in spotting hazards. Some test-takers click repeatedly hoping to catch the scoring window, but this strategy always backfires. The system interprets this behaviour as an attempt to game the test rather than genuine hazard perception.
Clicking too early, before any hazard develops, wastes potential scoring opportunities. Drivers should wait for clear evidence that a situation is developing into a danger, such as a car’s indicator flashing before it changes lanes or a child’s ball rolling towards the road.
The most common mistake involves clicking on static hazards like parked cars or road signs. The test only scores developing hazards that require a driver to change speed or direction.
Preparation Strategies for Success
Success in the hazard perception test comes down to three key areas: regular practice with official materials, gaining real-world experience during your learner period, and learning from your mistakes through detailed feedback.
Practising with Official Clips and Practice Tests
Practice tests are the most effective way to prepare for the hazard perception test. The DVSA provides official practice materials that use the same format and scoring system as the actual test.
Learner drivers should aim to complete at least 10-15 practice sessions before taking the real test. It’s also worth reviewing the 10 most common theory test questions to strengthen the multiple-choice section alongside your hazard practice. Each session helps build familiarity with how hazards develop on screen and improves reaction timing.
The key is to practise regularly rather than cramming all sessions into one day. Spreading practice over several weeks allows the brain to better recognise hazard patterns. Test-takers should focus on different scenarios including urban roads, rural settings, and motorways.
When using practice tests, learners must avoid clicking randomly or too frequently. The system detects cheating patterns and will award zero points for clips where this behaviour occurs. Instead, they should click only when they spot a genuine developing hazard.
Making the Most of Your Provisional Driving Licence
A provisional driving licence allows learner drivers to gain practical experience on real roads. This experience directly improves hazard perception skills in ways that computer practice alone cannot achieve.
During supervised drives, learners should actively look for potential hazards. They can practise spotting pedestrians near crossings, cars emerging from side roads, and changing road conditions. Discussing these observations with their supervising driver helps reinforce good habits.
The more varied driving experience a learner gets, the better prepared they’ll be for the test. Different times of day, weather conditions, and road types all present unique hazards. Regular lessons with widely regarded as one of the best driving schools in Manchester will sharpen your real-road hazard awareness far more than any simulator.
Using Feedback to Improve Performance
Most practice test platforms provide detailed feedback showing which hazards were missed and when clicks were made. This information is essential for improvement.
Learners should review every practice test carefully. If they missed a hazard, they need to understand why. Was the hazard not obvious enough? Did they react too slowly? Were they distracted by other elements in the scene?
Keeping track of scores across multiple practice sessions helps identify patterns. Some people struggle more with pedestrian hazards whilst others miss vehicle-related risks. Recognising these weak areas allows for targeted practice.
Frequently Asked Questions
Many learner drivers have specific questions about how the hazard perception test works and what techniques lead to success. Understanding the scoring system, avoiding common errors, and knowing the difference between hazard types helps candidates approach the test with confidence.
What are the key strategies for improving hazard perception skills?
Regular practice with official test clips builds familiarity with how hazards develop on screen. Learners should focus on watching the entire scene rather than fixating on one area, as hazards can emerge from any direction.
Real-world observation whilst travelling as a passenger strengthens hazard awareness. Learners can practise identifying potential dangers like pedestrians near crossings, cars emerging from side roads, or cyclists in traffic. This active observation translates directly to better performance on the test.
Developing a systematic scanning pattern helps catch hazards early. Drivers should check mirrors, look ahead at distant traffic, monitor the road edges, and watch for movement between parked vehicles.
Can you outline the best practices for taking the hazard perception test?
Candidates should click the mouse as soon as they spot a hazard beginning to develop. The scoring system awards more points for earlier responses, with a maximum of five points per hazard.
Clicking only once or twice per clip prevents the system from flagging responses as cheating. Multiple rapid clicks trigger an anti-cheat mechanism that results in zero points for that clip.
Staying calm and focused throughout all 14 clips maintains consistency. Some clips contain two scoring hazards whilst others have just one, so candidates must remain alert for the entire test duration.
What common mistakes should be avoided during the hazard perception test?
Clicking too early before a hazard actually develops counts as anticipation and scores zero points. Learners must wait until they see genuine evidence of danger, such as a pedestrian stepping towards the road rather than just standing on the pavement.
Clicking repeatedly or in patterns triggers the anti-cheat system. The test software detects this behaviour and automatically awards zero points for that clip, even if the learner correctly identified the hazard.
Waiting too long to respond reduces the score significantly. The scoring window closes quickly, and delayed reactions receive fewer points or none at all.
How can novices develop an expert level of hazard awareness for the test?
Consistent daily practice over several weeks builds the pattern recognition needed for quick responses. Learners should complete multiple practice clips each day rather than cramming all practice into one session.
Studying real-world driving scenarios helps connect test situations to actual road conditions. Observing traffic whilst travelling as a passenger trains the brain to spot danger signals faster.
Understanding what qualifies as a developing hazard sharpens decision-making skills. Learners should focus on situations where other road users or conditions force them to change speed or direction, as these always represent scoreable hazards.
In what ways can practice with simulation software benefit hazard perception test preparation?
Simulation software replicates the exact format and timing of the official test. This familiarity reduces anxiety on test day and helps learners understand how quickly they need to respond.
Practice programmes often provide feedback on click timing and scoring. Learners can see whether they responded too early, too late, or at the optimal moment for maximum points.
Exposure to varied scenarios improves recognition speed. Practice software typically includes dozens of clips showing different road types, weather conditions, and hazard situations that might appear on the actual test.
What are the differences between potential and developing hazards, and how are they identified in the test?
A potential hazard is something that could become dangerous but hasn’t yet. Examples include a parked car that might pull out or a pedestrian standing on the pavement who could step into the road. These situations require awareness but don’t score points on the test.
A developing hazard is actively becoming dangerous and requires immediate action. This occurs when the pedestrian actually steps towards the road or when the parked car’s indicators come on and it begins moving. The test only scores responses to developing hazards.
Learners must identify the moment a potential hazard becomes developing. This transition point is when the situation changes from something to monitor into something that forces a change in speed or direction. Clicking at this exact moment when the hazard starts to develop earns the highest scores.
Need help with your driving test?
Contact us Now
Tel: 03334049786